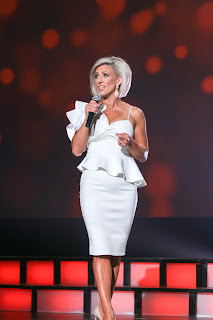
Pageant Hair Secrets!
I get asked all the time about how I achieve my pageant hair. It took me many years before I realized how to control and maintain my head of hair – it is thick and often unruly, but with the right techniques can work out well.
I find that the pin curl method works best for great (and lasting) volume and curl.
Step 1: Starting from the hairline, I take small sections of hair and spritz with a heat protectant from root to end
Step 2: Tease/Backcomb the root to create lift (Remember ladies, the higher the hair the closer to God!)
Step 3: Using a 1” curling iron, I curl from the end to the root away from the face and hold until the hair is heated all the way through (for me it is 10 seconds, however depending on your hair length, thickness, and curling iron temperature that can vary – please be cautious)
Step 4: After unraveling the now curled hair from the iron, it should now be in the shape of a loop. Secure this loop to your scalp by using a duckbill clip to hold it in place
Step 5: Repeat teasing, curling, and clipping in sections until your whole head is secure.
Step 6: Set… I typically will set my hair first and then do my make-up and get dressed. The longer you leave the pin curls in, the tighter the curls will be. I typically aim to leave them in for about 30 minutes.
Step 7: Take out pins and shake out hair. Arrange hair part and face framing piece and spray with hair spray for hold.
Step 8: PRACTICE, PRACTICE, PRACTICE!
Here is the video that helped me master this technique, however, I have made some changes based on trial and error. The major differences between her version and mine are the way she curls the hair and that I prefer to start from the front of the head and work my way backwards:
HOPE THIS HELPS!
Seek Happiness,
Jesse

Comments
Post a Comment